Windows XP - Computer Tips & Tricks
COMPUTER TIPS
Do not turn off your PC the wrong way because open files will litter the disk. When this happens, files get written to the disk differently than they normally would.
Backup your files every now and then. To access the backup option click on start, Programs, Accessories, System Tools, Backup.
To Keep your computer Healthy and up and running successfully make sure you do these things.
1.Use system Restore
2.Keep windows up-to-date with windows update.
3.Perform Backups
4.Be careful of what you install.
5.Uninstall programs using the add and remove program.
6.Use these programs to check and clean up your system: Disk Maintenance, Disk Defragmenter, Disk Cleanup and Scan your system with your virus protection software.
7.Don’t make changes to the windows registry.
8.Make sure you shut down the computer the correct way.
9.Compress large files.
COMPUTER TIMELINE
1946- Eniac- 1st large-scale computer
1947- ‘Bell’ transistor
1951- 1st commercially available digital computer
1954- Commercial production silicon transistor
1958- Integrated circuits
1963- Mouse patented
1967- Floppy disk
1968- Window, mouse-keyboard idea
1969- RAM Chip
1975- Microsoft Founded
1976- Apple Computers
1978- Space Invaders
1983- Apple Lisa 1st graphical user interface, CD ROM
1985- Windows Realised
1987- Microsoft releases Works
1989- Word for Windows
1990- Toy Story work Begins
1993- First Encarta
1994- Digital Camera/ Zip Drive
1995- Windows 95
1998- Windows 98
1999- Year 2000 Bug
2000- Windows 2000
2003- Windows XP, Apple Ipod
2004- Broadband
2007- Windows Vista Final Edition
MEMORY-RAM (RANDOM ACCESS MEMORY
Most of the time you can improve your computers performance when it runs any program by purchasing more ram. A ram chip is a bit of hardware that acts like a super fast disk drive, storing recently used files and programs. If you have noticed when you run a program, close it and open it back up again the program opens much quicker the 2nd time? That’s because the computer wrote the program into its ram and was able to call it up from memory instead of reading it off the disk drive. The more ram the better. Even though memory (RAM) and Hard Disk space are both measured in megabytes (MB), don’t confuse the two. Memory is used by your PC to run programs, and disk space is used to store files.
Memory modules that physically appear to be the same can differ dramatically in the actual speed of the memory and the type of memory used in the module. This is why it is very important to install only the exact type of memory designed for your PC. You can consult your PC’s manufacturer or your user guide to determine the exact type of memory you can use in your system especially if you are upgrading a slightly older PC. Memory (RAM)
Memory, or ram (random access memory), is the temporary storage your computer uses for the programs that you are running and the files you currently have open. Most PC’s have from two to four slots, and usually the computer is shipped with one or two of the four slots already containing memory. Memory comes in many different sizes, speeds, and types, so you must ensure that the memory you add is compatible with your particular computer. Memory chips are extremely sensitive to static electricity, so be sure to understand and follow the procedures needed to avoid static damage.
Adding more memory actually improves performance. Adding more memory enables you to run more programs faster, open more files and perform more tasks simultaneously. However, this performance boost has certain ceilings.
For example, if all you do with your PC is simple web surfing, some word processing, and light gaming, 128MB is sufficient. If you do a fair amount of gaming, tend to have a lot of applications open on your desktop at a time and do graphics and video editing, you probably want 256MB. Likewise, if your demands are very heavy, you might want to be sure that you have 512MB of memory. Your PC uses memory as a temporary storage area for your microprocessor to perform calculations, store data, and store programs you ant to run. Anything stored in memory, or RAM as it is called, remains there only as long as the power to your PC remains on, which is why RAM is also referred to a volatile memory. RAM-which is short for random access memory, or simply called memory-is an electronic storage area used by your computer for data, information, and programs. RAM is where your computer moves information for rapid retrieval either before the information is saved to the disk or as it retrieves previously saved information from the disk. Your computer can access information in memory about 1,000 times faster than from disk. Even though memory and disk storage both use the same reference designators for size (for example, KB for kilobytes, MB for megabytes, and GB for gigabytes), when the term memory is used, it always refers to the volatile electronic area where information is stored temporarily. It does not refer to your permanent disk storage area, which should correctly be called disk space, disk storage space, or hard disk space.
ADDING MEMORY
Adding memory is simple because no drivers are required. To add memory, follow these steps:
1.Shut down Windows, turn off and unplug the computer, open up the computer, and add the memory to available memory slots. Follow the instructions that came with the computer or with the memory.
Either use an antistatic wrist band (or a wire clipped to your metal wristwatch and the grounded metal frame); or, at the very least, touch a piece of the metal frame of the case to discharge static electricity before handling the delicate RAM, to prevent static shocks from damaging the RAM chips. You can even plug the computer back in while you are installing the memory chips, so that the third prong of the AC outlet connects your computer chassis to ground.
2.Unplug the computer if you plugged it back In, close it up, plug it back in, and start it up. Most PCs do an internal memory test, notice that the amount of memory has changed, and possibly display a message before Windows starts.
3.If your computer complains, enter the computer’s low-level configuration setup (also called BIOS setup or CMOS setup), and adjust the configured amount of memory to reflect the total now installed. Then reboot. When Windows starts, it automatically takes advantage of all memory installed in your computer.
The BIOS Setup programs of most computers can be accessed during the bootup process by pressing the DELETE, ESC or F1 keys, as instructed. If Windows doesn’t accept your new memory, the RAM card may not be seated properly or maybe defective. Reinsert the memory card and try again. If you have another computer, test the RAM in that computer also.
BURNING MUSIC CD'S
If you have a recordable CD drive, then you have the makings of your own personal recording studio. If you like Herb Alpert, Kansas and so on you can have them all on one CD!!!
Three major steps are involved in burning your own CDs. First you MUST record the music to the Media Library on your hard drive. This makes duplication quicker, simpler, and more flexible in terms of track choice. Second, you will need to create a playlist for the CD, which basically tells the Windows Media Player which songs you want on the CD. The actual Burning of the CD is the last step. Then click the copy to device or CD button.
Basic Tips
SETTING WINDOWS TO SHUT DOWN AUTOMATICALLY
Windows includes OnNow, Technology that powers down the computer when nothing is happening and powers back up when the computer is needed again if the computers hardware permits. To use OnNow, choose Start | Control Panel, click Performance & Maintenance, and then run the power options program.
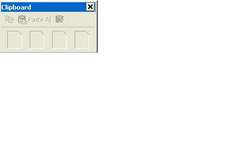
THE CLIPBOARD
Information on the clipboard takes up RAM, limiting the resources your computer has available to do other things. Therefore, if you cut or copy a lot of information to the clipboard, paste it quickly. Then cut or copy something small one letter or word, for instance-which replaces the large chunk of information on the clipboard and makes most of the RAM available again. Some programs clear the clipboard. These days word comes with a function on the clipboard toolbar to erase all the things you have cut or copied.
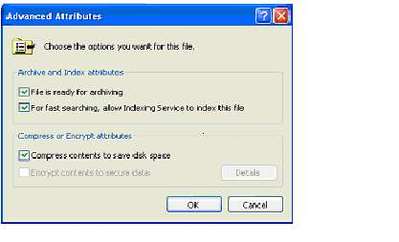
WHAT ARE COMPRESSED FOLDERS?
Compressed folders are folders whose contents are stored in such a way as to conserve disk space. The amount of disk space you can save by storing a file in a compressed folder varies depending on the kind of file it is; a Word document of 100k, for example, might only take up 40k in a compressed folder, while an acrobat document of 100k might still take up 80k in a compressed folder.
Windows XP actually has two types of compressed folders: NTFS compressed folders and ZIP compressed folders. NTFS compression, which is available for both files and folders, works only on NTFS partitions, and is completely invisible in operation. You compress or uncompress an NTFS compressed folder (or file) by changing it’s Compress Contents To Save disk space attribute on the advanced Attributes dialog box (right-click the folder or file, choose properties from the menu that appears, click the general tab, and click the advanced button to see this attribute).
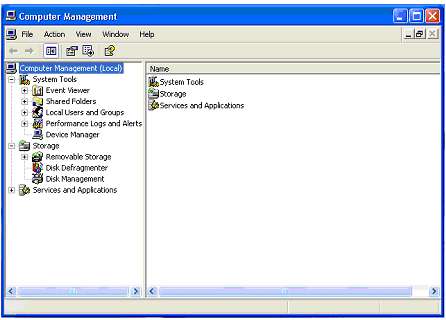
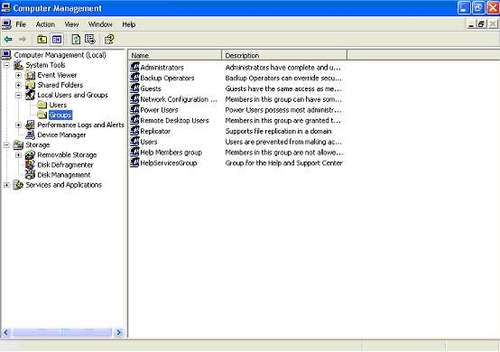
THE MICROSOFT MANAGEMENT CONSOLE(MMC)
Like Windows 2000, Windows XP collects lots of system tools in one place-the Microsoft Management Console (MMC). Strangely, the window that displays the MMC is titled Computer Management, but the program that provides the information (what is referred to as framework) is the MMC, and that’s what everyone calls it. The MMC can be the “frame” for a number of other “Pictures.” The pictures are called snap-ins, and each snap-in adds new capabilities to the MMC. (This is the same model that web browser’s use.)
To display the MMC, choose start, right-click My Computer, and choose Manage from the menu that appears.
Several items in the Computer Management MMC are of interest ton troubleshooting.
The System Tools section of the Computer Management MMC includes the following tools:
•Event Viewer
•Shared Folders
•Local Users and Groups
•Performance Logs and Alerts
DISPLAYING LOCAL USERS AND GROUPS UTILITY IN THE MICRSOFT MANAGEMENT.
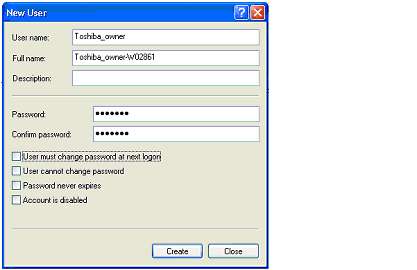
For more advanced settings, you need to use the Local Users & Groups utility in the Microsoft Management Console (MMC), a program that can display various Windows Configuration tools. The Local Users & Groups utility is not available in Windows XP Home Edition, but in Windows XP Professional. Choose Start and right click My Computer, and choose Manage from the menu that appears. You see the computer Management Window. Open the system tools item in the left (tree) Pane, if it’s not already open, by clicking its plus box. Click Local Users and Groups to see the Users & group’s folder, and click the users or Groups folder to see its contents.
OTHER SECURITY OPTIONS
Windows XP Professional (not including Home Edition) has many other security options, but most are of interest only if your computer is on a domain-based LAN. Here’s a quick once-over of policy settings- settings that control how accounts, passwords, and groups work.
If you want to look at policy settings that control users’ passwords, how many times someone can type the wrong password before windows locks the user account, and which rights are assigned to which groups, you can open the Local Security Settings window. Choose Start | Control Panel, click Performance and Maintenance, and click Administrative Tools. From the Administrative Tools window, run the Local Security Policy program. (Or, choose Start | Run and Type secpol.msc and press ENTER.)
The folders listed on the left side of the window contain groups of policy settings:
•Password Policy (in the Account Policies folder) Control whether user accounts need passwords, how complex they need to be, and how often people have to change them.
•Account Lockout Policy (in the Account Policies Folder)Control whether user accounts are locked out if someone types the wrong password more than a specified number of times.
•Audit Policy (in the Local Policies folder) Control what security events are included in audit log files.
•User Rights Assessment (in the Local Policies folder) Control which groups of user accounts can perform which types of tasks.
•Security Options (in the Local Policies folder) include a variety of security settings, including who may install printers, use the CD-ROM and floppy drives, and wether you can shut the system down without logging on.
BOOTING IN SAFE MODE
Safe Mode provides minimal Windows functions by disabling all devices except the keyboard, screen, mouse, and disk. If you are in windows and would like to restart in safe mode, restart the computer normally, but watch the screen carefully. As soon as you see the starting windows message, press F8 repeatedly. You should see a menu of startup options, one of which is Safe Mode. (Other options include Safe Mode with Network Support, which you can use if your 100% sure that the problem isn’t a network device, nor any other device that that might be conflicting with the hardware resources used by a network device.) Once you’ve booted in Safe Mode, you can use the Device Manager and other Windows facility’s to figure out what’s wrong.
To leave Safe Mode, reboot the computer normally.
CREATING YOUR OWN WEB PAGES
Previous versions of Windows came with a Web page editor called FrontPage Express.
Windows XP doesn’t come with a web page editor, although you can create Web pages using Notepad if you learn all the HTML codes to include. If you have Microsoft Word or Corel WordPerfect, you can save documents as Web pages, a much easier way to make pages. Web pages created by word processors tend to be huge, including an enormous number of unnecessary codes, but they work for quick-and-dirty pages that you plan to replace later. Better options are these:
•CoffeeCup HTML Editor This program is an easy way for beginners to create their first sites. Information is available from CoffeeCup Software at http://www.coffeecup.com. You can also download the CoffeeCup free HTML editor from the site.
•HomeSite This program is a full-featured, reasonably priced Web page editor from Allaire Software at http://www.allaire.com/products/homsite. You can download an evaluation version.
•Netscape Composer Netscape Communicator (Netscape’s suite of programs that includes Netscape Navigator) comes with a web page editor called Netscape Composer.
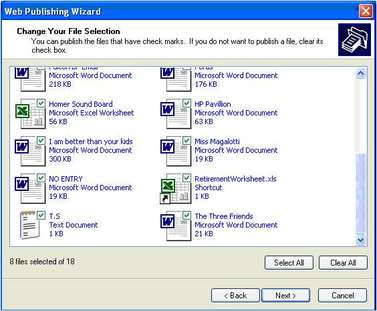
To make your web pages and picture files available on the web, you must upload files from your computer to a Web Server. You can use Web Folders to drag-and-drop Web pages to your Web server, or you can use the windows FTP program for uploading, but it uses arcane commands. Netscape Composer has a Publish button on its toolbar that makes uploading easy. Windows XP comes with a Publishing wizard, another way to upload files to a Web Server.
To run the Web Publishing Wizard, put the files that you want on the Web into one folder, and click Publish This Folder to the Web from the Tasks pane. The Wizard lets you select the files from the current folder to include, select a Web server from one of the Web hosting companies which Microsoft has decided to offer (including MSN), and (for pictures) choose whether to resize the pictures to reduce their file size (see figure below). When the Wizard is finished, it displays the URL of the page you have just created. Save this URL (using cut-and-paste to a notepad file or other file) so that you can tell other people to visit your page.
WHERE TO GET INTERNET PROGRAMS
Lots of Winsock-compatible Internet programs are available for downloading from the Internet itself.
Some are freeware programs that are entirely free to use; some are shareware programs that require you to register the program if you decide that you like it; some are demo programs that let you try a partially disabled version of the program before you decide whether to buy the real program; and some are commercial programs that ask you to pay before downloading.
Many web-based libraries offer all types of programs. Here are some favourites:
•he Ultimate Collection of Windows Software (TUCOWS) at
http://www.tucows.com/ Classifies programs by operating system and type.
It has lots of mirror sites (identical Web sites) all over the globe, so it’s rarely a problem to begin downloading even very popular programs. It’s exceptionally easy to browse a long list of programs of a given type (browsers or email programs, for example) and compare reviews.
•The CWApps List at http://cws.internet.com This is the original Winsock library, and it is still excellent. Forrest Stroud set up this site when shareware and freeware Internet software were starting to become available.
•CNET Shareware.com at http://shareware.cnet.com Offers lots of Non-Internet- related programs.
•Download.com at http://download.cnet.com Has thousands of downloadable programs organized by category.